The first step in setting up our foundation was moving the blocks aside so that we could dig out the piers.
We hired some help to excavate 6.5 ft deep holes for all of our piers.


Once the holes were dug, the crew filled them with gravel, concrete, and rebar.


Before we could move the piers back into their original location we had to do some major structural reinforcements in the places where the piers were to rest. We went around each corner of the house and repaired every one that needed attention.
First we cut out the rot and structurally weak corners.


You don't want to set your foundation on a piece like that!

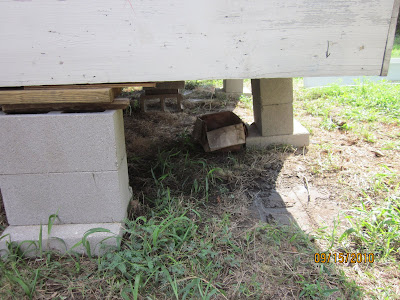
Here is what the corner looked like when it was still in tact with the beams under our house.

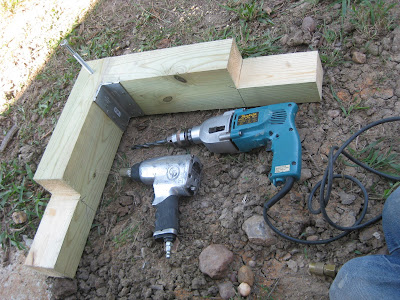
We cut out new replacement pieces and made an awesome structure for each corner that was in bad shape.

Here is a simple step by step.
1. First cut out the rotten wood.
2. Notch out old beams to accept new wood.
3. Cut new pieces to fit.
4. Assemble new corners with 5 inch bolts, PL400, and steel corner brackets.
Check it out!


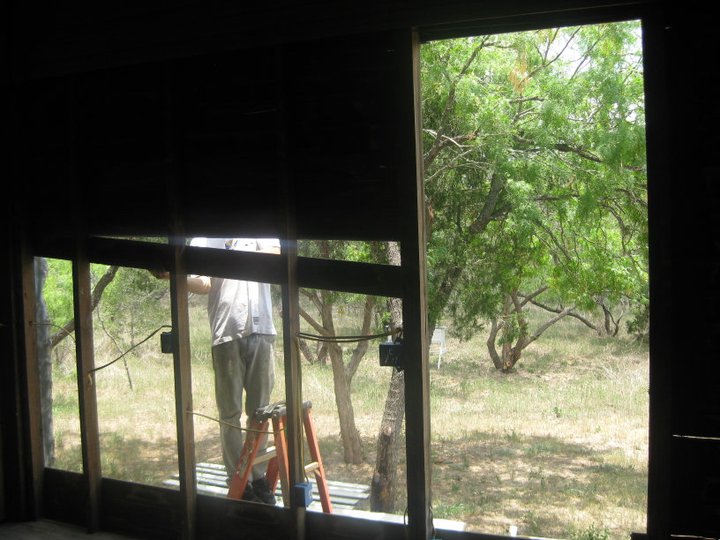
Look Dad! I'm using your drill ;)


Some of the beams were in obvious need of help as well. So we reinforced them.

Hurtin.

We replaced every weak or rotten board with sturdy treated wood.

And double reinforced the new joint on every side with bolts and PL400.


Once the reinforcements were finished, we moved all the blocks back in place over the piers and began leveling the house.
We made a home made water level that worked great! With the help of our cousin James, we leveled the house!

Precision leveling :)

James under the house helping out with the leveling process.

Now we are finished leveling the house! Onto the next project!!!


 And here is my new closet :) It lives in our "utility room"/ future bath room.


 We hired some help to excavate 6.5 ft deep holes for all of our piers.
 Once the holes were dug, the crew filled them with gravel, concrete, and rebar.

 Before we could move the piers back into their original location we had to do some major structural reinforcements in the places where the piers were to rest. We went around each corner of the house and repaired every one that needed attention.

 Here is what the corner looked like when it was still in tact with the beams under our house.
 We cut out new replacement pieces and made an awesome structure for each corner that was in bad shape.
 Here is a simple step by step.


 Look Dad! I'm using your drill ;)


 Hurtin.
 And double reinforced the new joint on every side with bolts and PL400.
 Once the reinforcements were finished, we moved all the blocks back in place over the piers and began leveling the house.
 Precision leveling :)


